All lessons (and the project files):
First thing to emphasize before moving anywhere forward, and this has to be taken seriously, is that I am nowhere near an expert in what I’m going to write about in this and the following few posts. So keep in mind that the motivation behind these texts is purely to (a) collect and publish in one place, share and save for the future what I’ve learned recently spending hours googling at different sources, (b) motivate and convince people that to make cool and awesome stuff one doesn’t really have to be a first-class programmer and (c) learn/share a lot of things for myself in the very process of writing this!
 _Our goal for this lesson is to learn how and why the thing on the picture above works._
So in this and the following few posts I’ll be sharing a lot of handy “how-to”-s on working with the so-called NodeMCU Arduino board. If you don’t know what that is, don’t worry, I’ll spend a couple of paragraphs explaining the terms, how things work in general, and what you’ll need to have to get started. If you’re a more advanced user, you can feel free to skip all these beginner details and go straight to the code and recipes.
Ok, let’s begin, I’ll start with answering some brief questions and giving some overview of available resources to help people familiarize with the topic (just the same way as I started from the very scratch about 6-7 months ago).
So what is an Arduino?
Arduino is a family of microcontrollers (CPU+RAM) that can accept instructions and interact with the environment according to these instructions through the so-called pins. Pins are basically inputs and outputs of an Arduino from which the controller can accept and send signals. Now I’m not going to go into too much details in this topic (there’s plenty of literature on that, just google it).
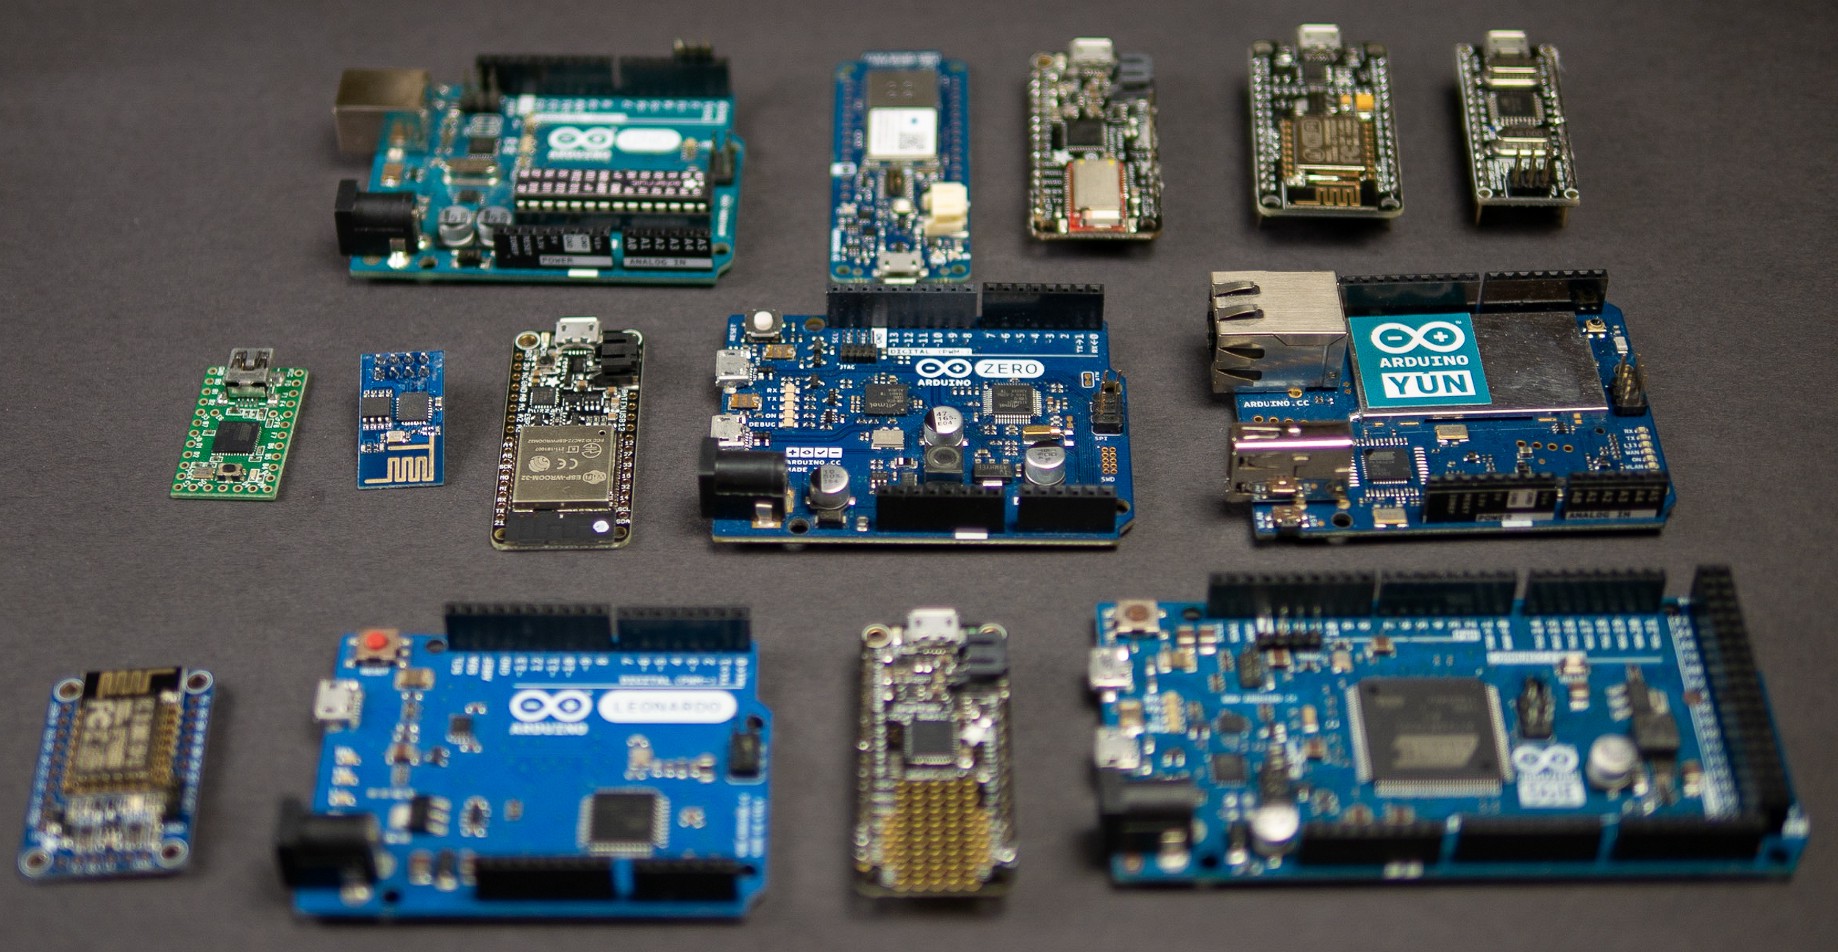
Now the main conceptual difference of Arduino platforms with other microcontrollers / microprocessors is that they’re pretty user-friendly and cheap, meaning you don’t really have to go into gory assembler details to program it and you can get them for ~$2-3 (these are actually Chinese analogues, but they work just as well). Cool thing about Arduinos is that they can compile C++ code (some even work with python).
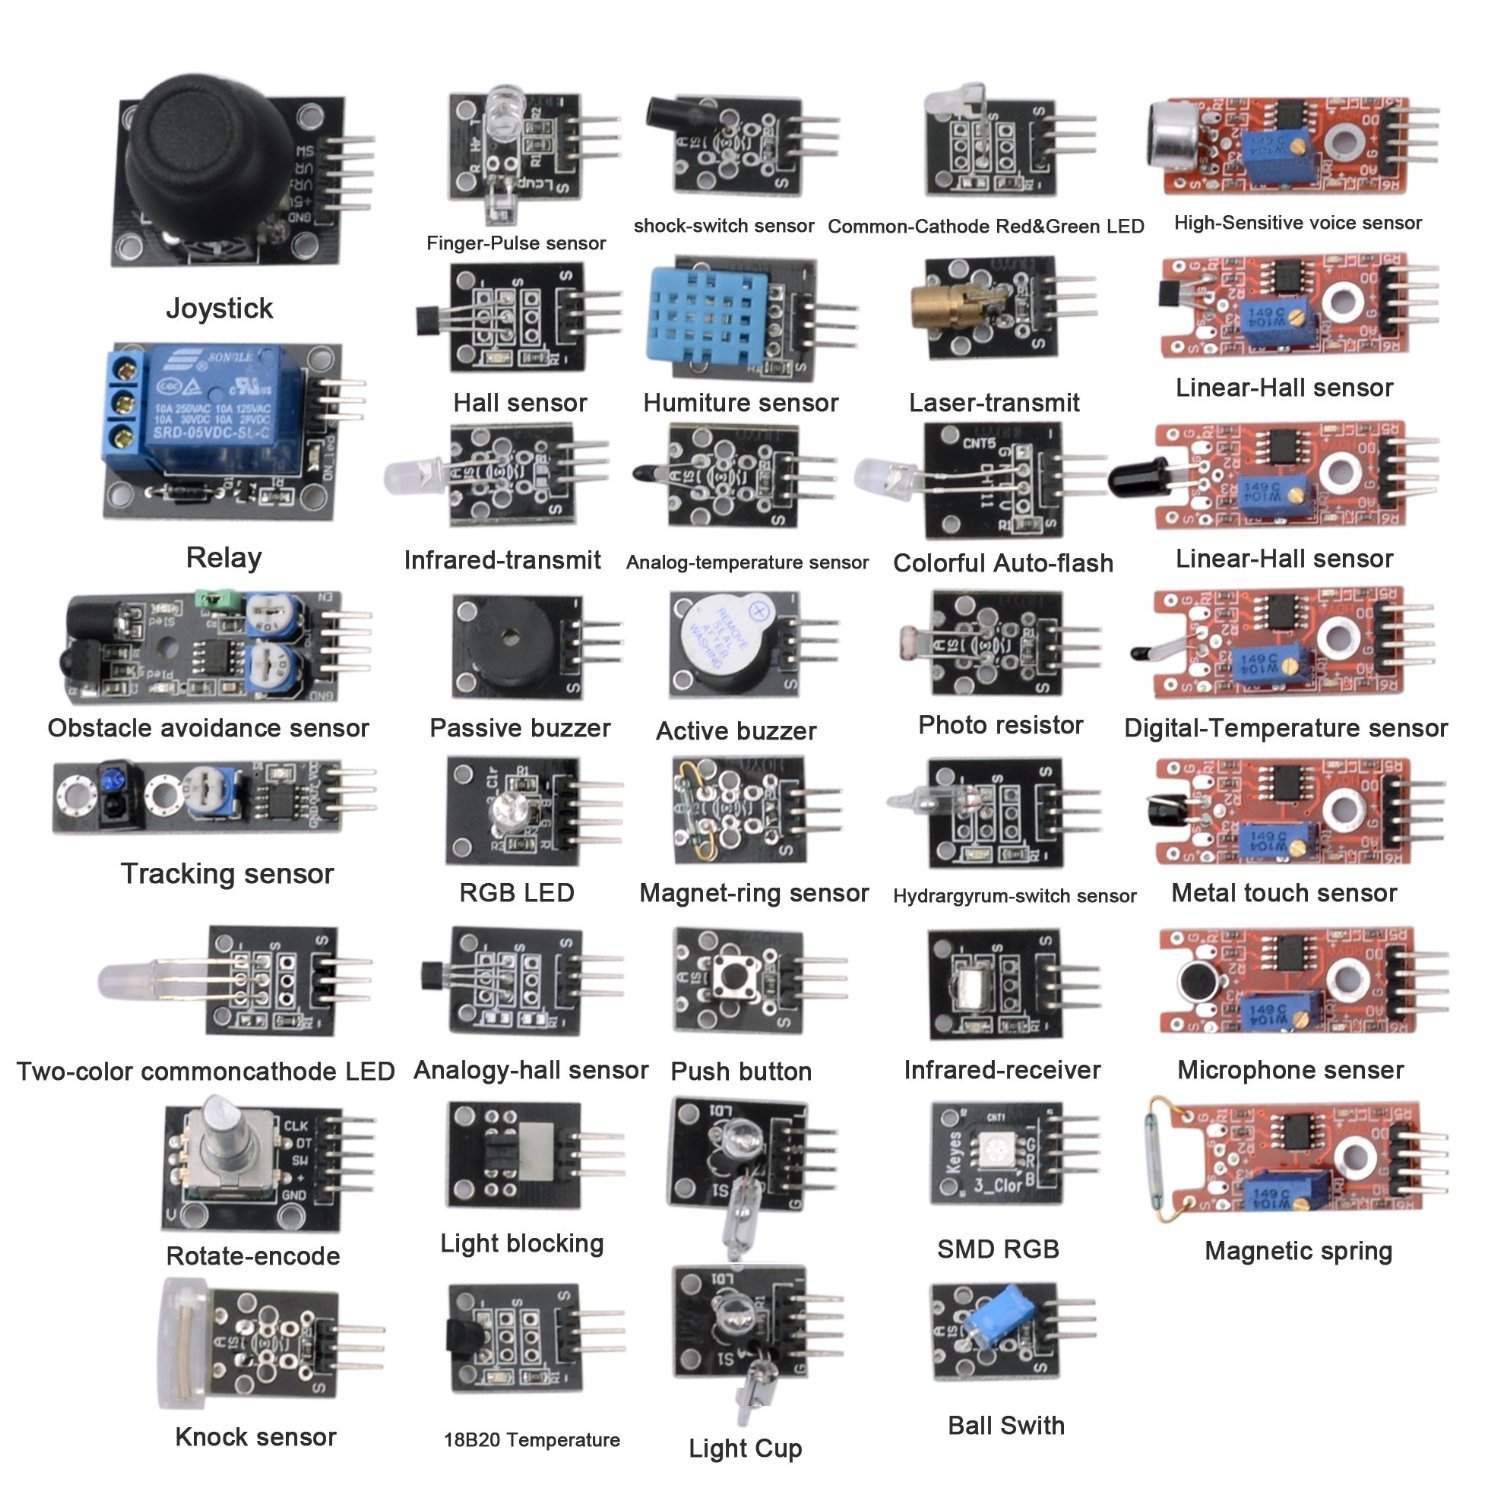
Arduino itself is just a computational brain of any automated project that your fantasy can think of, and of course a brain by itself can barely be useful. For that, Arduinos usually come with a great variety of different detectors, sensors, modules, etc, which can interact with the Arduino through the pins. These modules are also pretty cheap and can be very powerful if used properly. Connecting these modules to Arduino and working with them through C++ instructions is fairly easy, as most of these modules come with handy libraries.
Arduinos also have the so-called Serial Monitor which is basically a service channel used to communicate with the programmer in the process of developing and debugging (same as in js people use console.log(...) or in python print(...) and raise). We’ll learn how to access this channel in this tutorial.
What can I make with these Arduinos?
Whatever your imagination and time are capable of. In this case really the hardware for whatever utility you can think of is pretty cheap, so the only thing that could limit your project is your imagination, with which I can’t really help, or your coding skills and experience, which I’ll try to help you with. You can create anything from a humidity and temperature detector that will warn you every time a rain is going to come and will log the sensor readings to a cloud server, so you can view it to an interactive lamp from LED-s that flashes and changes colors with the background music. Or a robot that will drive your cats mad in case they try to open that dusty closet again. Or like I did, you can make an LED screen that displays the most recent NBA scores (updated during the actual game). You can even make a device which will horn an alarm every time Trump tweets, how cool is that, eh?
So what I really want to give you in these tutorials is an impulse, a brief introduction to useful techniques and tools to make sure your experience in programming and building these projects is as quick and comfortable as possible. Mostly these skills are going to focus on making IOT (internet-of-things) tools, which is why we’ll be using a particular Arduino platform with a built-in WiFi module.
Online resources
- Google – obviously this is the main source of information in just any topic, from there you can find resources like the Instructables, Hackster, etc;
- Arduino.cc – you think of Arduino as a framework built around
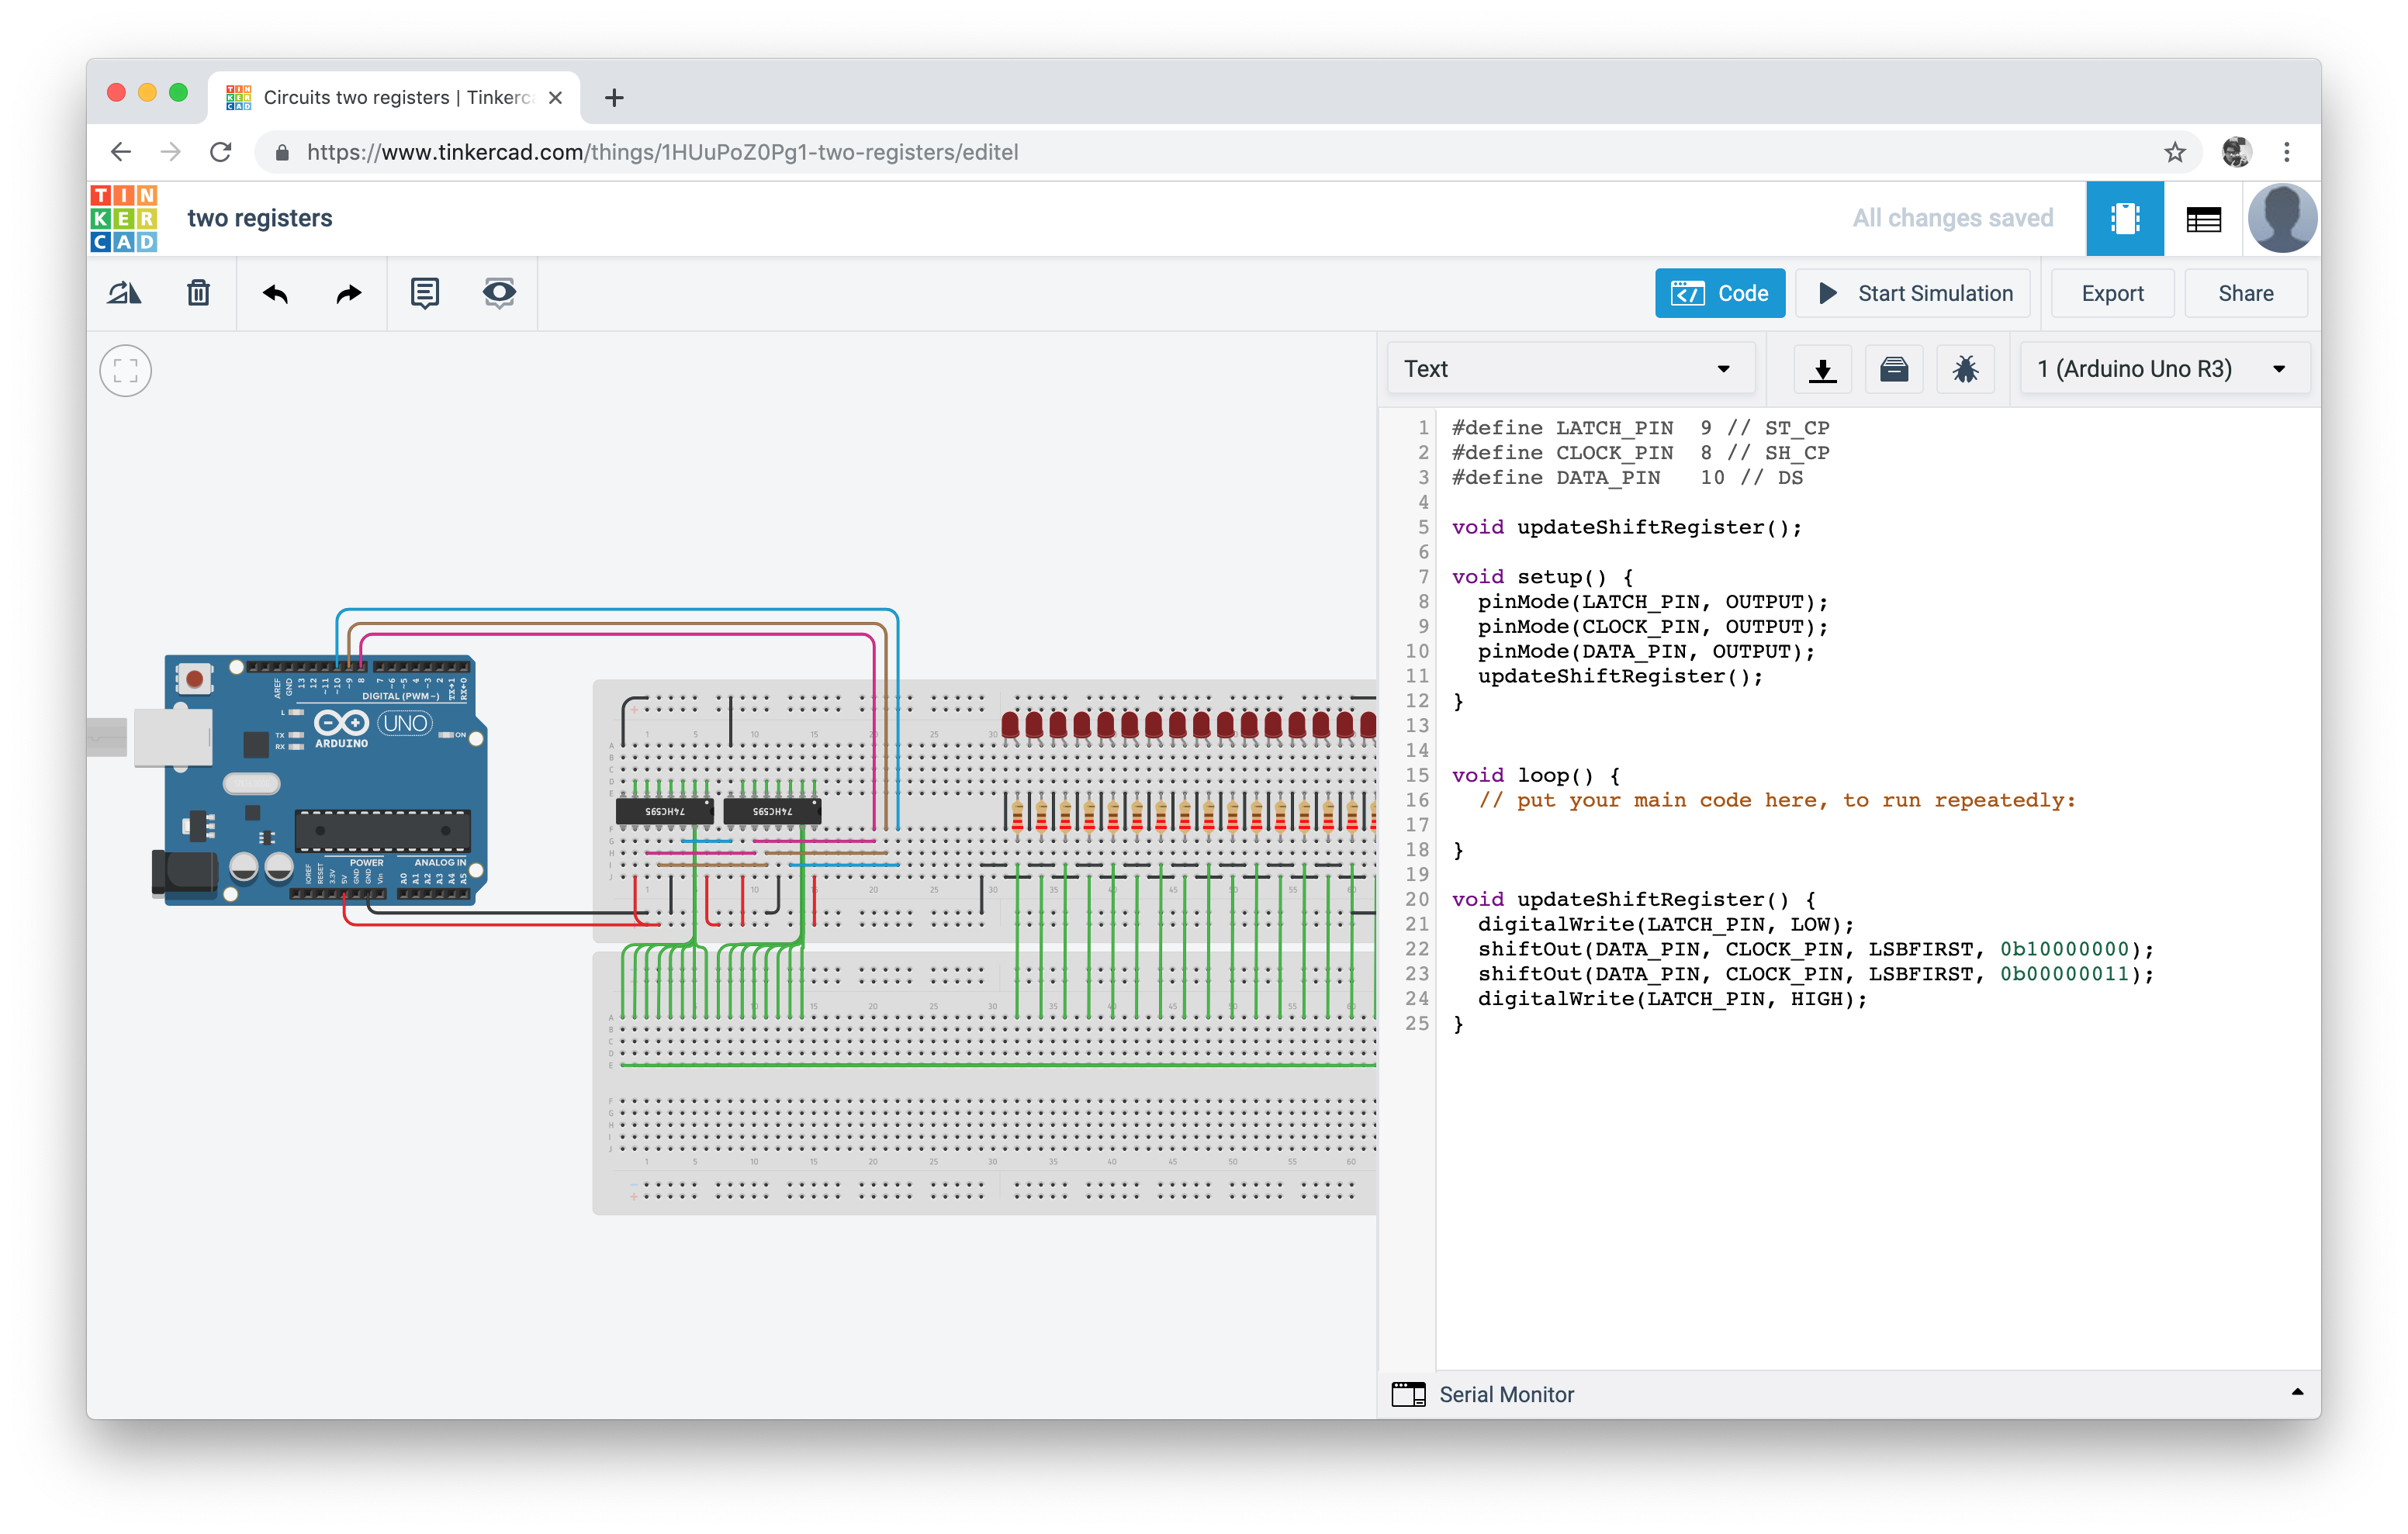
C++to help you communicate with the microcontroller; this website contains all the necessary information on the built-in functions, routines, types and constants that go into that framework; /r/arduino– here at Reddit people share their experience, discuss stuff and get inspiration;- Tinkercad – now this might first seem a bit too trivial, but this online tool is very powerful and useful, especially at the very beginning, when you still don’t have a lot of the modules and chips yourself; you can make circuits with lots of different elements, modules, sensors and an Arduino, and even write a workable code for it and simulate the behavior; it’s pretty cool and totally worth trying at the beginning (the first animation is made using it).
What will I need to start working on these tutorials?
There really are only a couple of things you’ll need to get started.
Hardware:
- laptop/PC – here we’ll be writing, compiling and uploading our codes;
- WiFi network – the best, of course, would be to have a personal WiFi hotspot;
- NodeMCU Arduino platform – this is basically an Arduino microcontroller with a built-in ESP8266 WiFi module, because WiFi makes everything 2.4 times more fun (here’s where you can buy this little beast: amazon, aliexpress);
- USB to MicroUSB cable – to connect this Arduino to our laptop (once we set up a thing called ArduinoOTA, you can actually program Arduino through WiFi without having to connect it);
- power adapter (5V or 3.3V) – Arduino can work from the power from USB cable while connected to our laptop, however, if we want it to work autonomously, we’ll need to supply it with some power (amazon, aliexpress); during the development I actually use one of these things, as they can be easily attached to a breadboard, but for a final product you’ll really need to have a power adapter soldered to the proper Arduino pins.
Software:
- Atom/VSCode + PlatformIO – now people, especially at the beginning, tend to use much simpler code editor (Arduino IDE), but I would suggest you start using these from the very beginning, as it really makes life much simpler (I personally use Atom, but VSCode is pretty much the same);
- NodeMCU drivers – since the laptop/PC has no clue how to communicate with the Arduino through USB, we’ll need to teach it by installing some drivers (you can google on how to do that for you particular version of NodeMCU, or download one from here);
- browser – well, don’t tell me you don’t have a web browser on your laptop/PC in 2k19.
Prerequisite knowledge:
- some basics of
C++– you could of course just blindly copy the code from here, but it would be very helpful if you have at least some background inC++; - very basic knowledge of
html/css/js– this again will be helpful, otherwise you can just rely on the codes copied from here; - zeroth order understanding of how server-client communication works – client sends commands, server handles them and sends the answer back, that’s pretty much it, the rest are gory details about connection protocols;
- school level knowledge of electronics.
That’s pretty much it, all the relevant libraries can actually be downloaded from within the Atom/VSCode PlatformIO framework, so no worries about that so far.
First code on Arduino
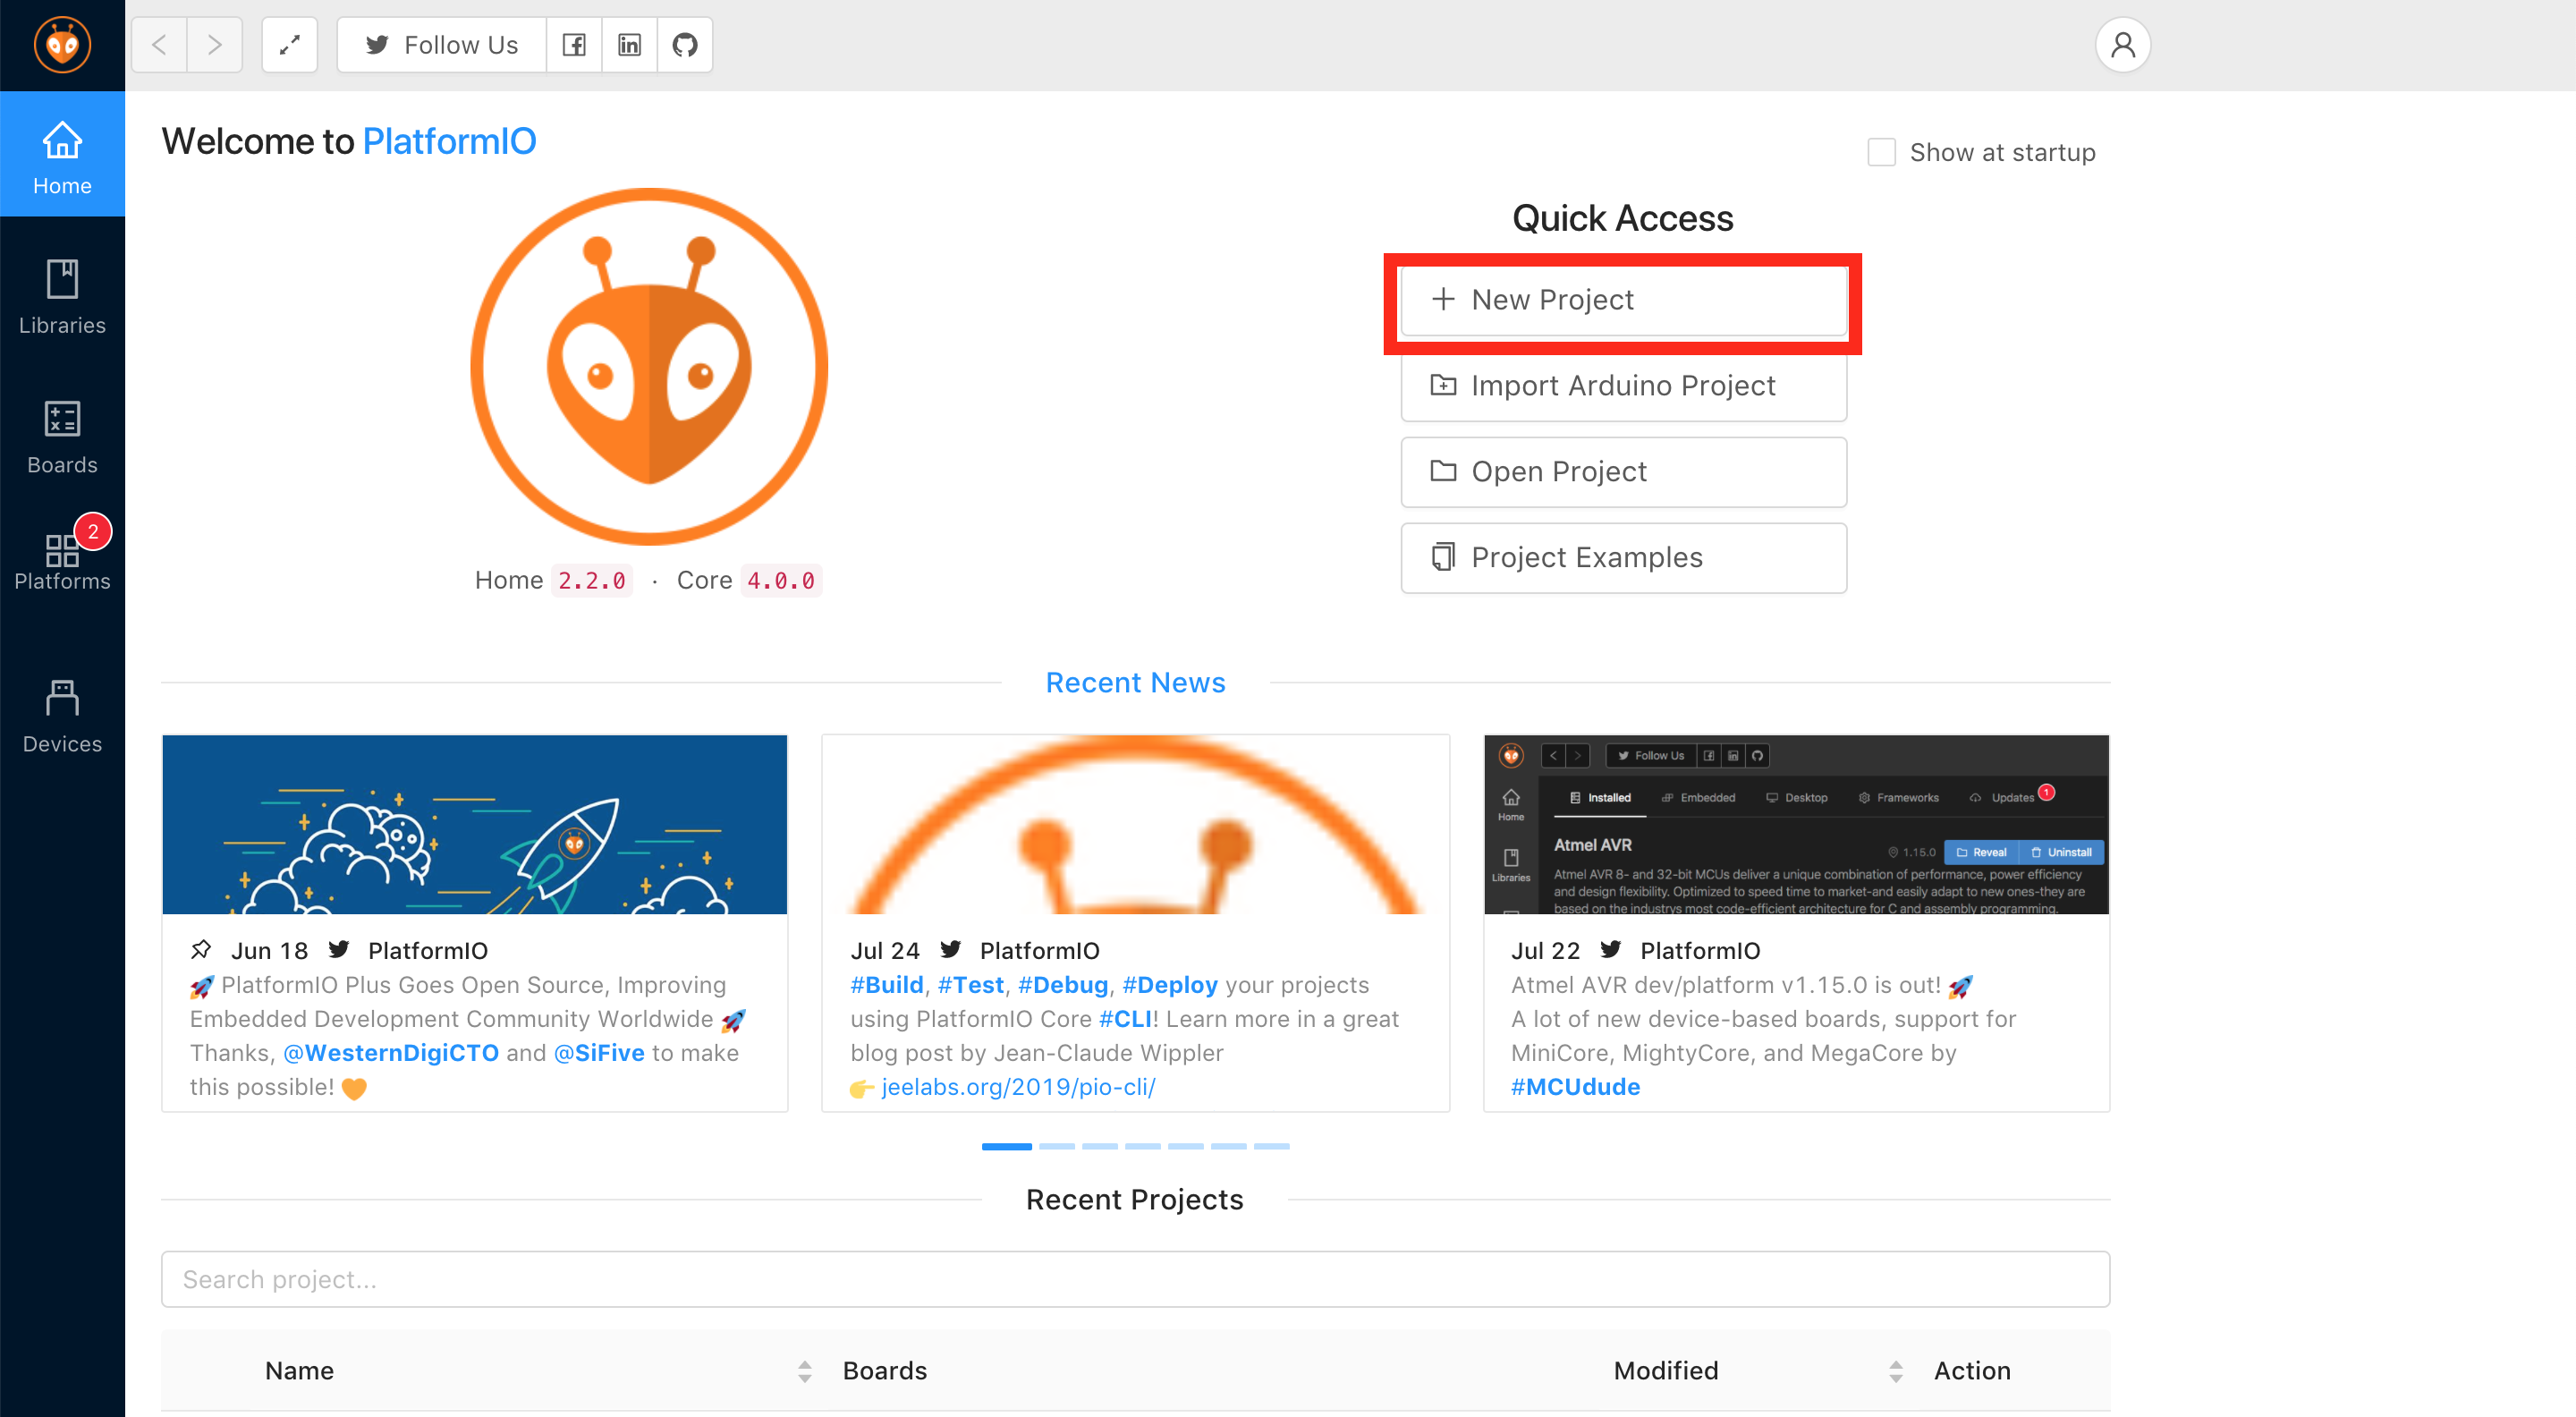
1. Create a new project
Let’s start from scratch. Open Atom/VSCode and open the PlatformIO Home page. We’ll create a new fresh project like shown below.
Choose the name for your project and the relevant board (in my case it’s NodeMCU 1.0).
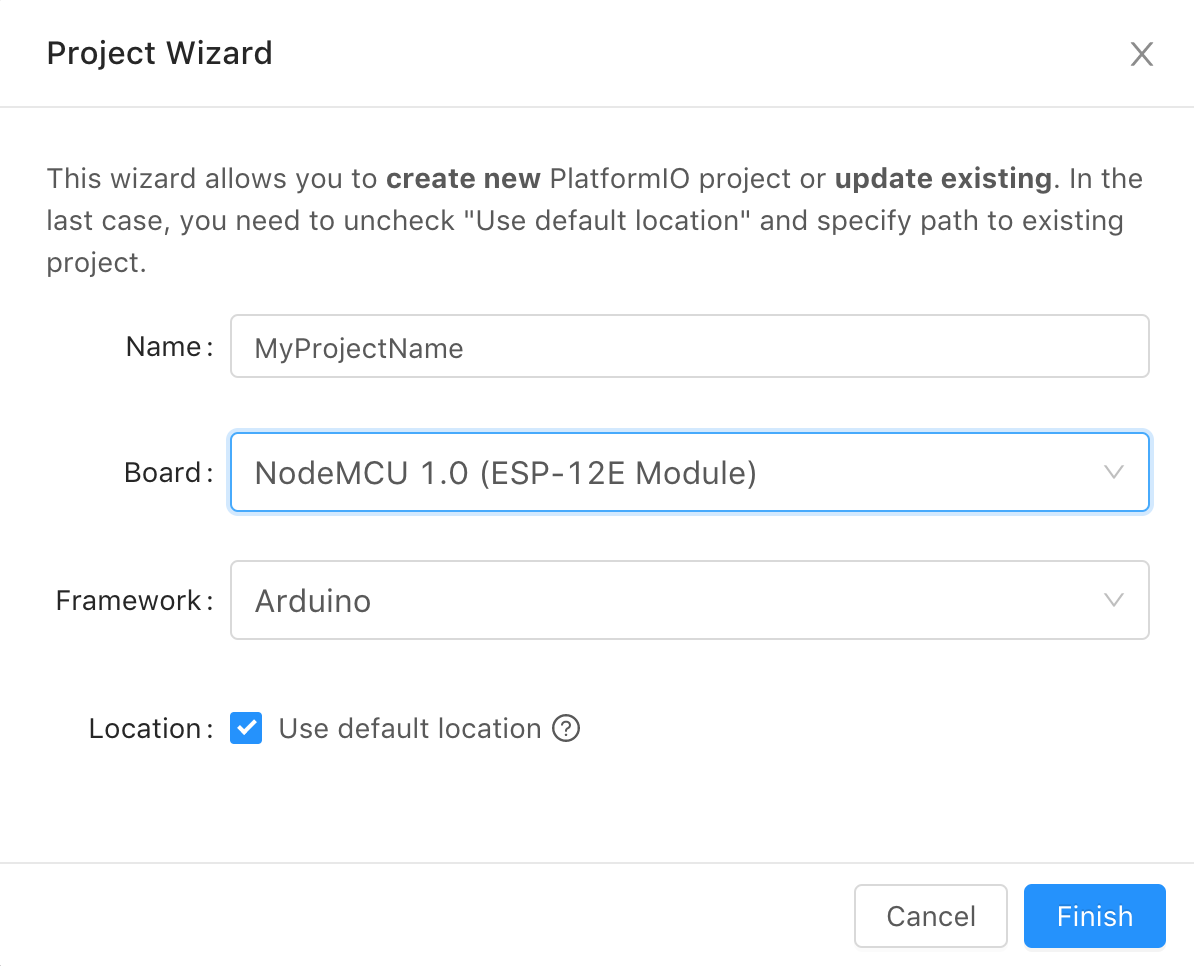 This will create a generic directory for your project and populate it with a bunch of service files and folders. We’ll look at some of them shortly.
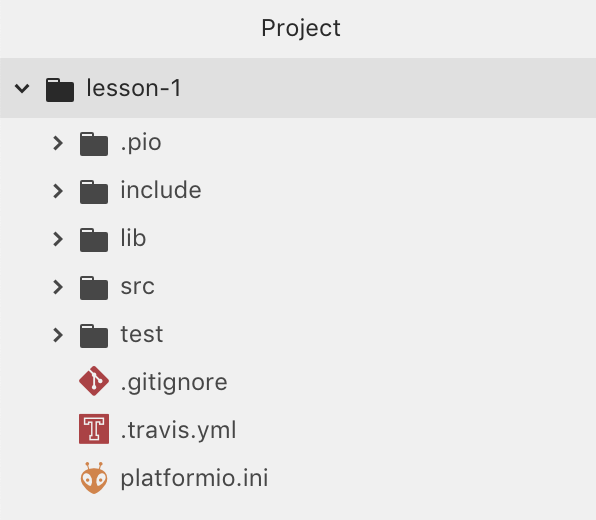
2. Heart of the code
Now src/main.cpp is the heart of our code, this is the main file Arduino “reads” and every project will have this file with the following basic structure:
#include <Arduino.h>

void setup() {
  // put your setup code here, to run once:
}

void loop() {
  // put your main code here, to run repeatedly:
}
In the first line we basically include the default Arduino library which we’ll be doing with any project. It includes a lot of built-in functions, constants and types, and you can read more about that here. You don’t have to explicitly #include this if your working from Arduino IDE, but when working from PlatformIO it is necessary. Then there come two functions that we’ll be populating each time we write an Arduino code.
As comment in the code says, setup() is a function which is called just one time at the very beginning, when Arduino is turned on and operating. We will use it to initialize things, like the serial monitor, wifi communication, sensors, etc (or imagine you want to reset some kind of a timer each timer Arduino boots).
Then the loop() function contains instructions called in an “infinite” loop; every time an iteration is complete, another iteration begins as fast the Arduino can allow.
Now let’s try to actually populate these functions and make our little microcontroller do something for us.
3. First code
Copy the following code to the main.cpp and save the file.
#include <Arduino.h>

void setup() {
  Serial.begin(74880);             /* initialize serial monitor */
  pinMode(LED_BUILTIN, OUTPUT);    /* set LED pin to output mode */
}

void loop() {
  Serial.println("LED ON");
  digitalWrite(LED_BUILTIN, LOW);   /* turn LED OFF */
  delay(2000);                      /* wait for 2 seconds */
  Serial.println("LED OFF");
  digitalWrite(LED_BUILTIN, HIGH);  /* turn LED ON */
  delay(2000);                      /* wait for 2 seconds */
}
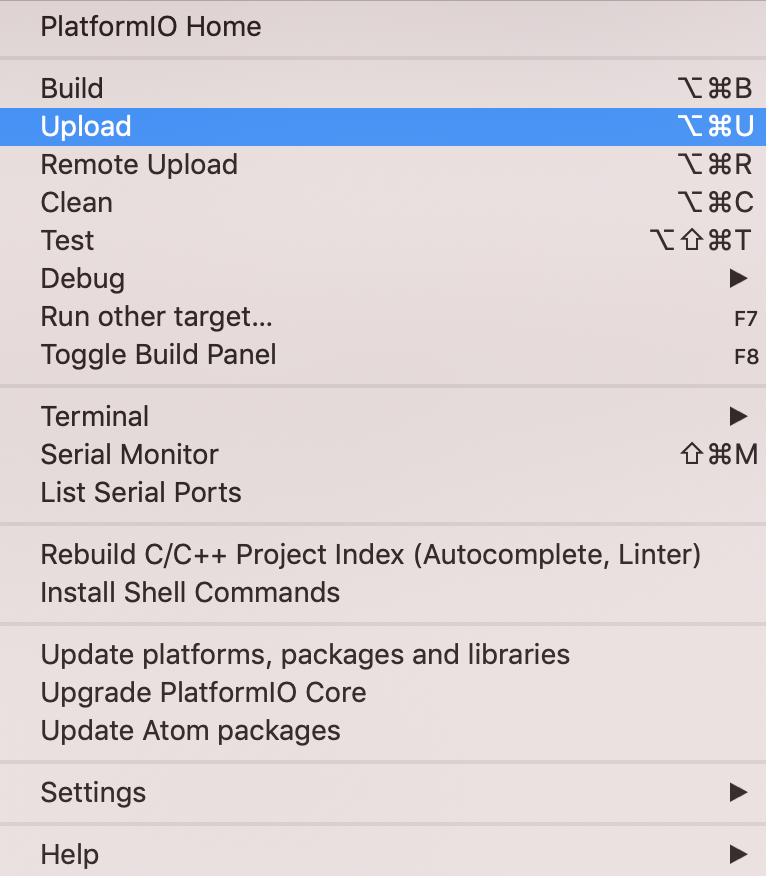
Connect your NodeMCU through USB-microUSB adapter to your laptop and click upload in Atom’s PlatformIO menu (on mac there’s a hotkey: cmd + alt + U). This will compile the code and upload it to the Arduino, if things are properly connected. You will see a terminal with a progress bar and a Success at the end.
4. What have we just done?
If everything is successful (if not, please troubleshoot by googling, there are plenty of forum posts etc on that) you will see the LED on your Arduino board switching on and off every 2 seconds. The comments on the code should be self-descriptive, but let’s go quickly through the code.
In the setup we initialize the serial monitor, that service channel for communication we talked about earlier with a specific number, in this case 74880. This is the so-called baud rate measured in bits per second, or the rate at which Arduino can send information to our computer for service purposes. NodeMCU-s tend to work with baud rates up to 115200, but I find it usually ok to work with 74880.
Then we want to say, that we’ll be messing up with the built-in LED, so we initialize the pin that is responsible for controlling that LED to the output mode. LED_BUILTIN is just a c++ macros, a global parameter defined through #define at compilation time, with a specific hexadecimal number.
Now in the loop we first set the signal on LED_BUILTIN pin to LOW (this ironically corresponds to LED being ON), then wait for 2 seconds with a built-in delay() function and then turn the LED off by setting it to HIGH.
5. Serial monitor
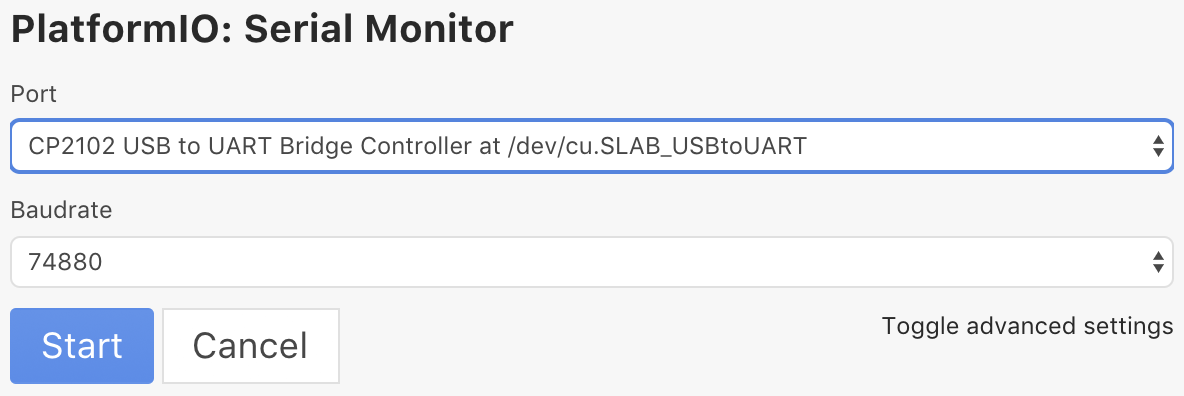
You can also notice that we print something through the serial monitor, but how can we access that? For that you can open PlatformIO -> Serial Monitor (or cmd + shift + M on mac), choose the USB port corresponding to your Arduino and the baud rate (the one we specified in the setup()), and click Start.
Now you should see that every 2 seconds Arduino prints something, in this case it prints ON and OFF as we specified in the code, isn’t that lit? I usually use this serial monitor to debug the code, it comes in pretty useful.
There are many resources available online to learn coding on Arduino. You can google and find your favorites to stick around basics before moving forward, as the purpose of these lessons is not to repeat the basics but to provide you with a few hacks and skills that are actually not so easy to find online.
In the next lessons we’ll learn how to connect our NodeMCU to our WiFi network and load instructions without having to physically connect to our Arduino via USB. Stay tuned!
cd ~